my blogmy blog

my diary
Cats and Lasers

I finally am a full member of the internet – I am the proud servant of two cats! To keep them entertained when me and my wife are at work, I built a web-controlled laser-turret:

At its heart is an ESP2866 on an nodemcu amica v2, a cheap servo pan/tilt kit with small 9g servos and some no-brand laser-module rated for 5v and 40mA.

In this build-log I will write about the process of creating it.

The code and all files I used can be found in my github-repo: https://github.com/TobiasWeis/cats_and_lasers.

Control a RaspberryPi Robot using Python and a mobile browser

Usually I use some physical buttons or joystick attached to my electronics in order to quickly test or control components like motors, relais or LEDs. I was searching for a better way, but could not really find one. In this article, I describe how I built a RESTful webserver with websockets, and a javascript-based based interface in form of a website. That way, any linux-based robot-controller can be controlled using a cellphone or a tablet. The code needed can be found here: https://github.com/TobiasWeis/robotcontrol-javascript

Interactive, low-latency javascript-based websocket-GUI for touch-devices with a python-flask backend that interfaces to robotic components. It provides virtual 2-axis joysticks (inspired by nipple.js but without the multitouch issues) and buttons that all work simulatenously. Due to the two-way websocket connection, status-messages from the robot can be displayed in the text-area.

Triangulate 3D points from 3D imagepoints from a moving camera

Given two image-points from two different positions of a camera, we want to calculate the 3D coordinate that this point is located at in the world. This is highly related to Structure from Motion (sfm) approaches, where we try to create a dense 3d point-cloud using consecutive images (of course this will only work if the 3D worldpoint in question is not moving itself, or if we know it’s movement):

CR-10S – The beast from the far east

This printer is a beast indeed. It features a build-volume of 30x30x40cm, looks cool, feels sturdy, and produces really good prints!

However, it is pretty loud out of the box, which drastically reduces the WAF (wife acceptance factor). Below I will describe the modifications I did to make it silent and suitable for the living room.

Semantic segmentation for automotive scenes: ENet

In order to be safe, reliable and fast, autonomous cars need to be able to perceive their environment and react accordingly.

Fabrikator Mini v2

My robot is in desperate needs of new parts, so I ordered the Fabrikator Mini v2 from Hobbyking (below 200 EUR with shipping). It has a 10x10x10cm build volume and a sturdy metal frame while it’s only 17cm wide, 18.5cm deep (28cm with the spool holder mounted in the back), and 18cm high, which means it fits in one compartment of an IKEA KALLAX shelf. The first impression is very positive!

In this post I will describe my first experiences, the setup in windows/linux, and which settings work best for me using RepetierHost and Slic3r.

Python tips and tricks

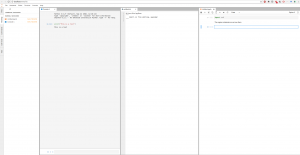
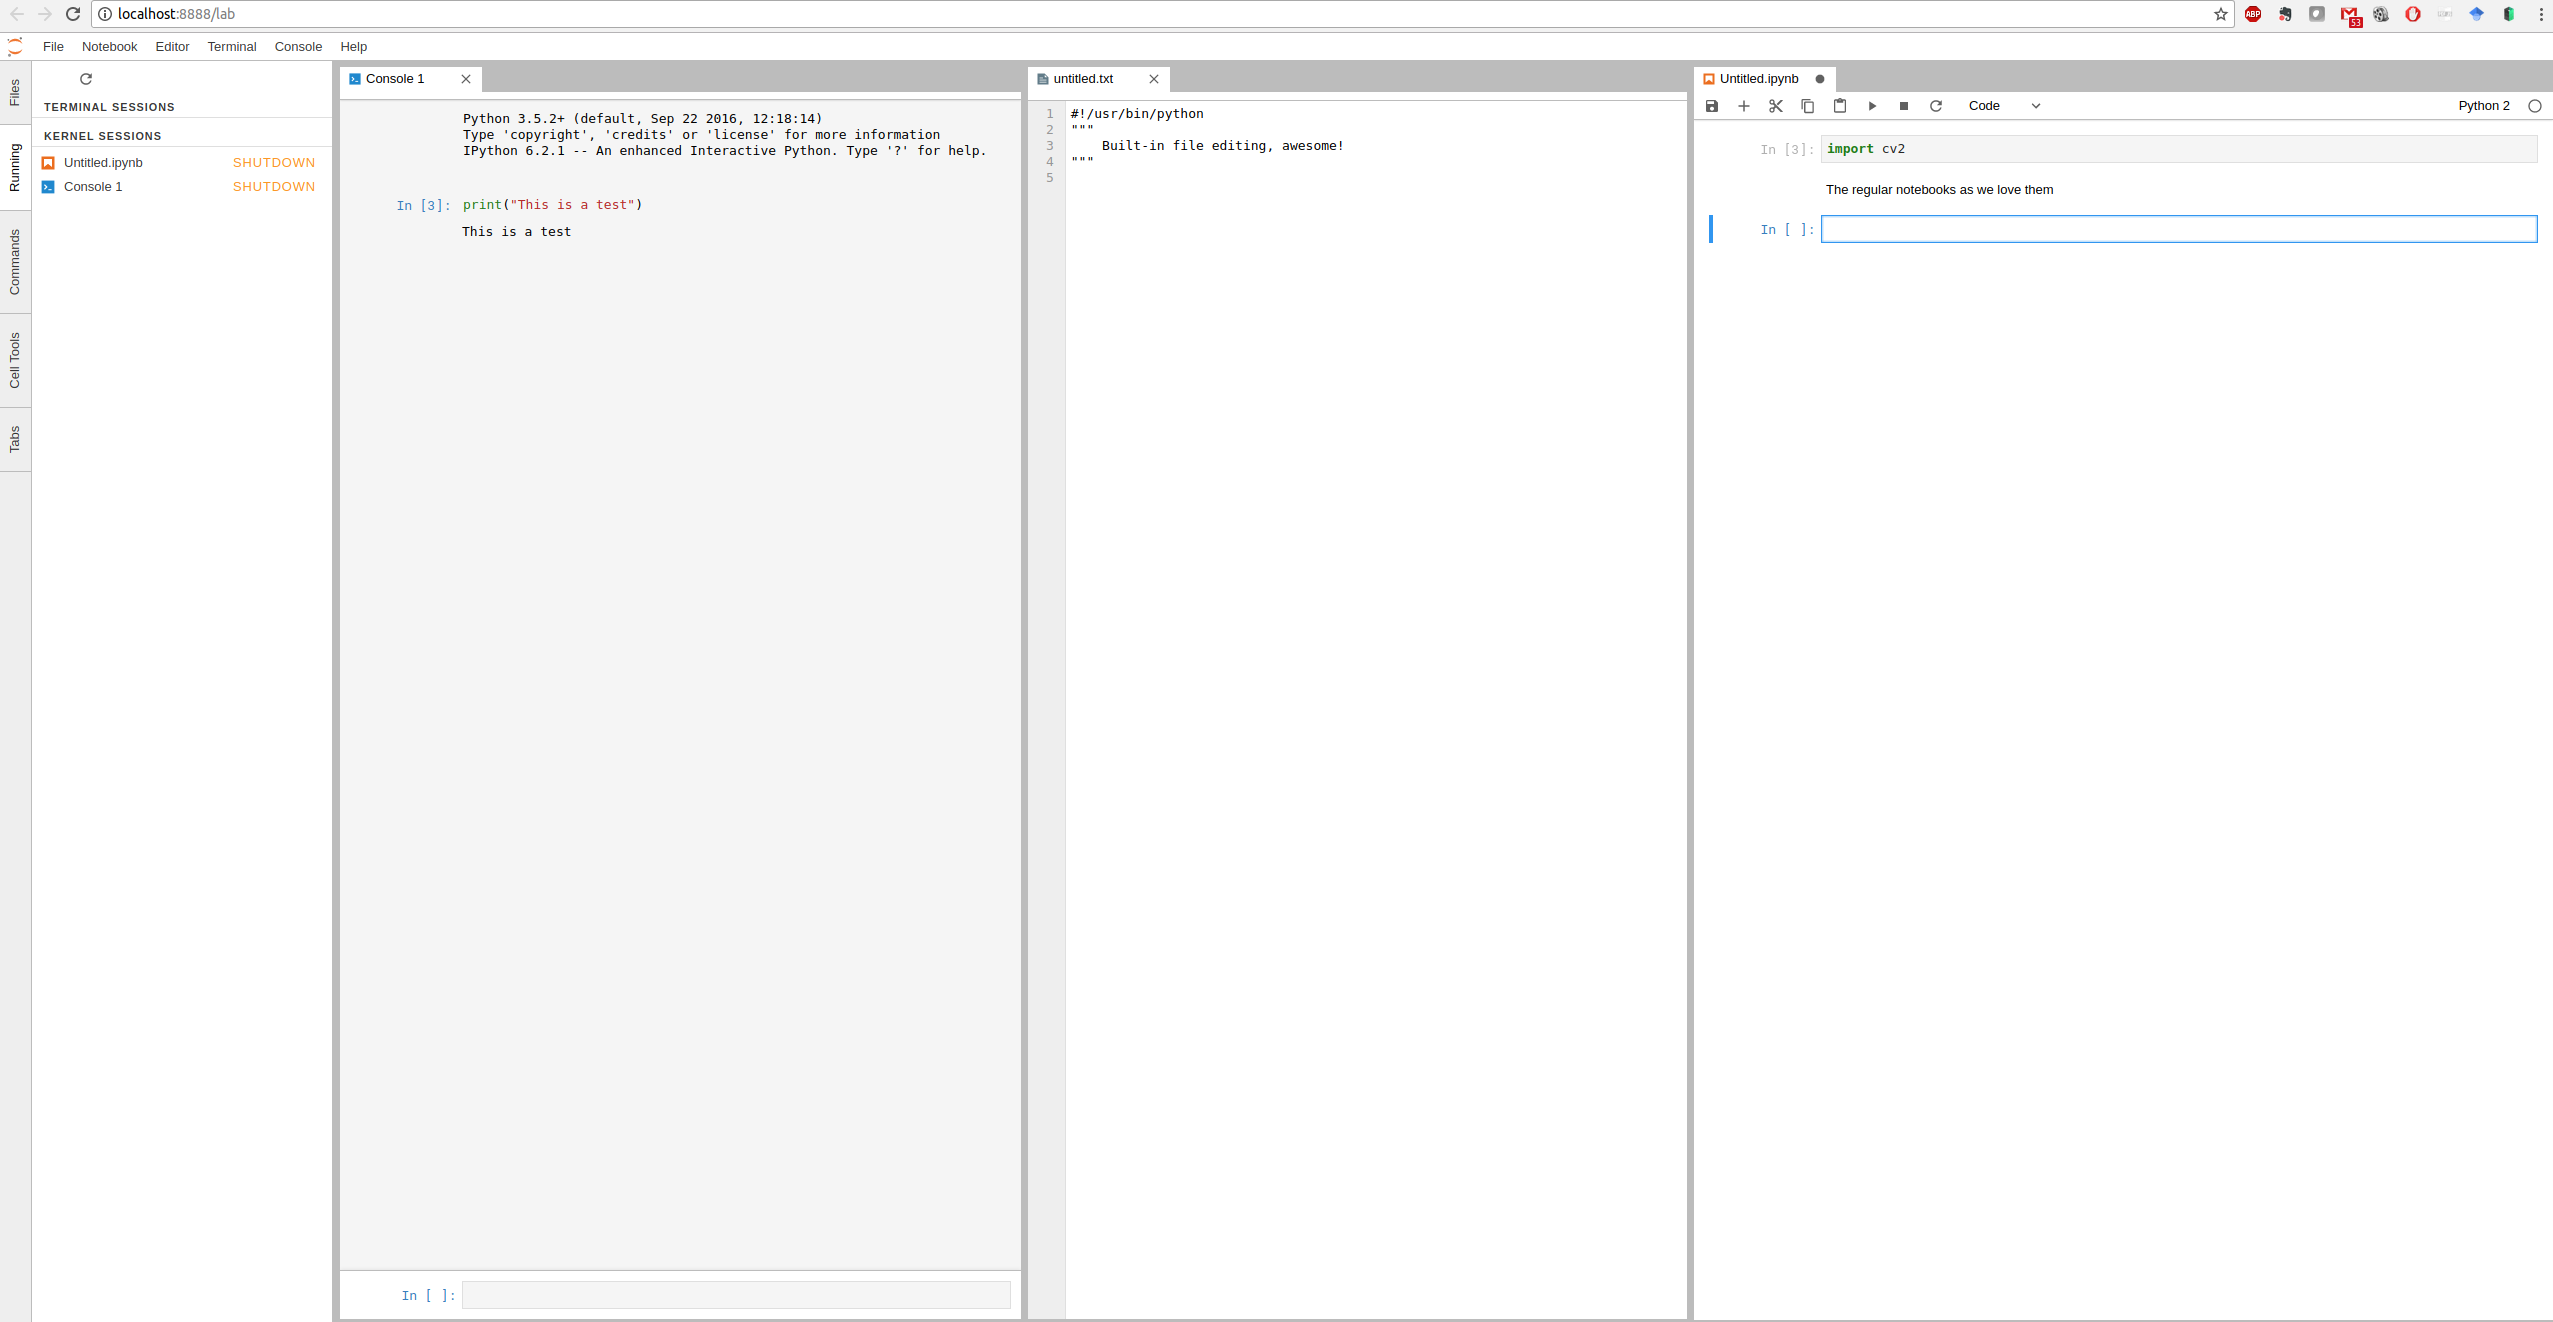
Introducing jupyter-lab

Vim is all fun and games, but for interactivity, storytelling and presenting, or just interactive prototyping, nothing beets jupyter notebooks. Some fine guys have taken it one step further and introduced jupyter lab, which is a wrapper around our beloved notebooks. It offers easier kernel-selection, multi-window notebooks, built-in python consoles and some more.

Autoformatting Python Code

Sometimes, a lot of authors, editors and OSs mess up the indentations and style-conventions of your files.

Here is a astyle substitute for python-code: https://pypi.python.org/pypi/autopep8 (sudo pip install autopep8)

autopep8 --in-place --aggressive --aggressive <filename>


Vim and Python

Put this modeline either in one of the first or last five lines of your python file:

# vim: tabstop=8 expandtab shiftwidth=4 softtabstop=4

and put

set modeline

in your ~/.vimrc file.

Running Python Scripts

I still see a lot of students running python scripts like this:

python myscript.py

In linux, we can make use of the shebang. This line, which has to be the very first line in your script, tells your system what program to use to run your script.
In case of python, this is a simple

#!/usr/bin/env python

followed by a

chmod +x myscript.py

Now you are able to start the python script just like any other executable to run it:

./myscript.py

.
I know, it only saves one word, but nevertheless I find it more convenient and wanted to share it with you.

Measuring voltage on a Raspberry Pi and displaying it in style

After I completed the circuitry to power my raspberry pi from a battery pack, I wanted a way to display the voltage of the battery pack, and be able to access the voltage level from the raspberry pi, so it can shutdown automatically when critical voltage levels are reached to prevent damage to the filesystem or draining the battery too much.

Powering a raspberry pi from battery

The raspberry pi will be the main processing unit of my pypibot. I want to power 6v-motors, so I decided on going with a 7.2v battery-pack. I had one lying around with 2600mAh, which should be enough for testing the setup right now.

I originally planned on going the easy way and ordered a converter from 8-36v to 5v, with a micro-usb-connector already wired (from DROK). Without any other load this worked nicely, although the input voltage was below 8v. But as soon as the motors have been wired up, the voltage would drop too low for this thing to still output 5v, and in consequence the pi went down.

So, here is the definite way to go if you want to power a raspberry pi in a robust way from a 7.2v battery (or anything above that voltage):

Using an adjustable DC/DC power converter! While these units cost little over 5 EUR (for 5 units in total), they take anything from 4V – 35V as input, and the output voltage can be configured by turning a little screw on a potentiometer. In my experiments, the voltage could drop as low as 6.1v, and this unit would still supply a rock-steady 5v to the pi (once setup, it will deliver steady 5v on the output for a wide range of voltages actually). They can withstand 3A max, which should be enough for the raspberry pi and any sensor I hook up to it.

I ended up soldering a micro-usb-connecter to it myself:

In a first testrun with the 7.2V, 2600mA NiCd battery pack I had lying around (it is quite old, so it probably has a far lower capacity than that), the Raspberry Pi lasted 1 hour and 42 minutes, while driving around with the motors from time to time: up 1:42, load average: 0.48, 0.33, 0.33.

Neato XV Laser scanner (LIDAR)

So today my Neat XV LIDAR module arrived, and I had to test it directly with the Raspberry Pi. For everyone that does not know this wonderful piece of hardware yet: It is a low-cost 360-degree spinning laserscanner that is usually scavenged from the Neato XV vacuum-robots. In Germany it is quite hard to get your hands on one, so I ordered one via ebay from the US.